
Thank you for your interest in my experience and thoughts on stands, gathered over the past five years through designing custom, one-of-a-kind stand solutions. It turned into quite a long story… :) To make it easier to read, I’ve divided the material into several parts.
With this knowledge and by addressing questions that may relate to your own setup, I’d like to help you make the right decision from the start when it comes to stands and ergonomics, even if you don’t end up buying from me. ;)
If you ever have questions, feedback, or personal experience to share, I’d be happy to hear from you and continue helping whenever I can.
This knowledge is first shared with my subscribers. You can join the list here: 5 Years of Desktop Stand Design
This series is built around three main topics:
__Function & Ergonomics: stand angles, elevation, stability, practical usability
__Technical Insights: materials, structure, long-term durability
__Interesting details you might not think about: practical insights and overlooked details
Let’s begin I’ve expanded on three topics in this first section:
__ Function & Ergonomics: Part 1
Wedge shape vs. Leg Stands: Lateral Stability
In my opinion, wedge-shaped “stands” are more like display supports than real instrument stands, especially since they aren’t connected or securely attached to the instrument in any way. They usually consist of two wedge-shaped blocks, ideally with rubber feet on the bottom and, even better, anti-slip material on top where the gear rests.
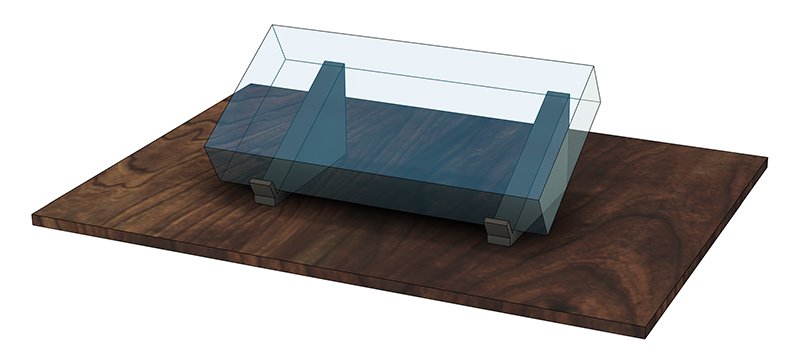
The tilt angle is usually fixed, and compatibility mostly depends on depth how large a unit you can “safely” place on them. They’re lightweight, portable, and work with many devices, but because of the narrow contact area and lack of a rigid connection between the wedges, the setup can easily tip sideways. With heavier or wider instruments, stability improves somewhat since the instrument itself acts as a stabilizer, but with a very lightweight controller, even a small bump can make it slip or fall off the desk:
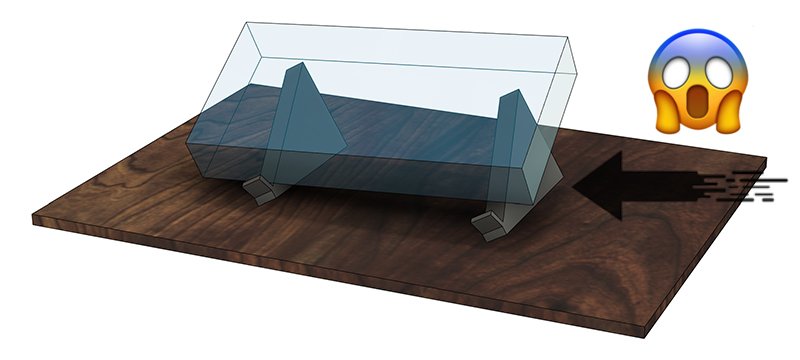
Practical drawbacks: Not recommended for finger drumming or hard button pressing the entire setup can shift or topple, even from a slightly pulled cable.
Ergonomically inconvenient: the system cannot be moved with one hand. If the wedge sides are closed, you can’t even grab it properly with two hands; you have to remove the instrument first, realign the wedges, then place the unit back.
When does it make sense? If you need to slightly tilt a wide, heavy synthesizer or controller and the stability is sufficient. In these cases, choose wider wedges or use three pieces instead of two to reduce the chance of lateral tipping.
Summary:
In my experience and opinion, a wedge-style stand is not a universal instrument stand. It’s fine for display use, but as a synthesizer stand or for intensive playing (pads or top-mounted controls that require pressure), it’s unstable. Some creative fixes with larger bases can improve it, but for everyday use, it’s better to choose a stand that provides greater side-to-side stability.
__ Interesting details you might not think about: Part 1
How to keep your stand stable right where you place It
The first and most important thing when choosing a stand is that your instrument should stay exactly where you put it. The surface matters, and so does how the instrument’s weight is distributed across the support points. A slightly curved or glossy tabletop, or a poor-quality rubber foot, can easily create an unstable situation. If you constantly have to worry about it sliding back or needing adjustment during a performance, that tension breaks your concentration and disrupts the creative flow.
When I designed the early cornelisdigitaal stands, I tested many different types of rubber feet. Some that were originally meant for instrument enclosures or stick-on silicone pads didn’t improve stability at all, in fact, they often made the surface more slippery. Interestingly, I found that the lighter the overall system (stand plus instrument), the smaller the contact area needed for proper grip. So, a bigger surface doesn’t always mean better stability: what really matters is the friction between the materials. That’s why custom-designed stands for specific instruments perform much better than universal ones.
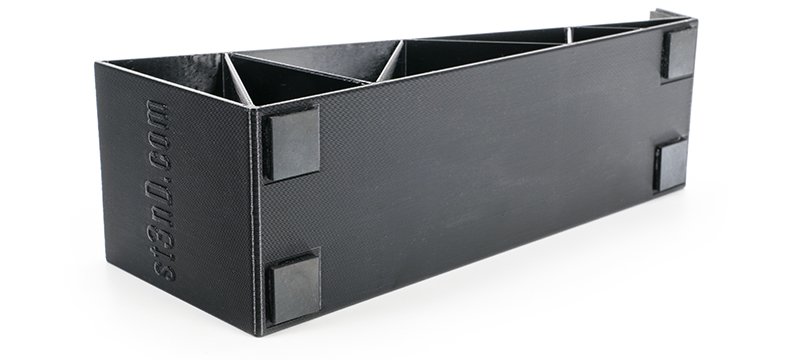
It happens occasionally that an instrument’s housing is slightly twisted or warped from the factory. Even a few millimeters of deviation can cause it to rock on the table, which can be quite frustrating. Adding a fully rigid stand only exaggerates the wobble. This is why stand feet should be slightly flexible, able to absorb those small irregularities. For lightweight devices, I prefer using soft foam pads for this reason.
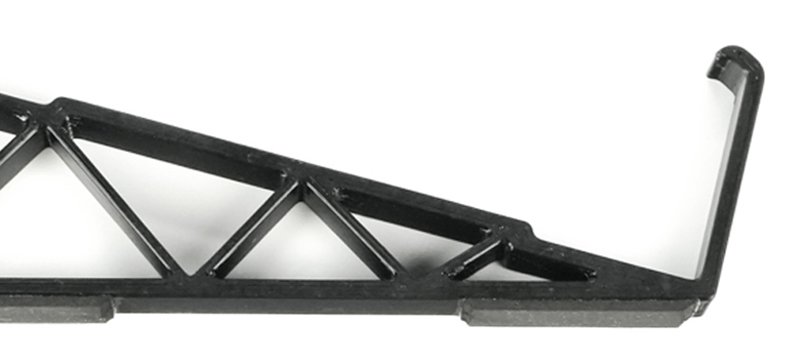
Another common issue is when one of the instrument’s factory rubber feet is missing, either because it fell off, got scraped away, or melted slightly on a warm surface. In such cases, an EasyLock-style stand can be a lifesaver, which doesn’t rely on the device’s original feet but instead supports the instrument independently, wrapping around it and avoiding the damaged or uneven points.
A few practical tips:
– Observe how your instrument behaves when you press a button, and imagine that same motion on a tilted stand on your desk.
– Always make sure the stand you’re planning to buy has some form of rubber feet, and avoid solutions where bare plastic rests on the table (I’ve seen competitors call that a “stand” too many times).
– Check that all feet make contact with the surface. If it wobbles, choose a soft-footed stand so the flexible material can compensate.
– Factory rubber feet usually work well, but if the surface or device shape prevents proper stability, choose a stand that bypasses the original feet and provides its own solid support.
Summary:
The goal is simple: your instrument should stay perfectly in place with the help of the stand. It shouldn’t move, slide, or require a second hand to hold it steady. That’s what creates the stable, natural feel that keeps your work or performance smooth and uninterrupted.
__Function & Ergonomics: Part 2
Do You Need a Stand When the Gear Is Right in Front of You?
Not every situation requires a stand. Most instruments, synthesizers, and controllers are well-designed to sit directly on a desk or flat surface. With proper rubber feet, they usually stay stable, don’t wobble, and don’t slide during normal use. If the table height, chair height, and your posture are well matched (meaning neither too high nor too low), then you don’t need to raise or tilt the instrument for comfortable ergonomics.
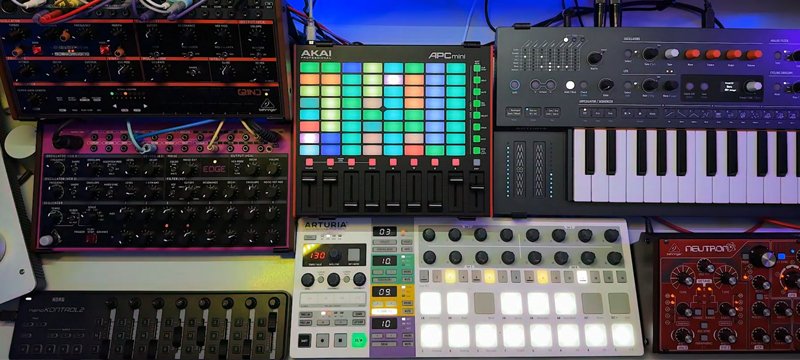
When does it still make sense to use a stand in front of you?
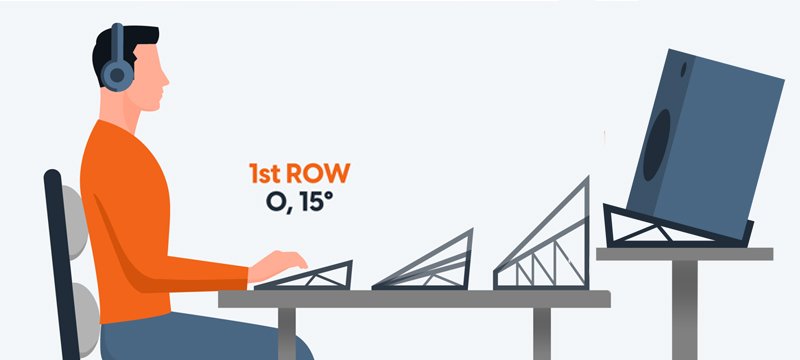
– In cases where a slight angle improves visibility or accessibility. For example, when from a comfortable sitting position, knobs hide labels, when the LCD screen has glare or poor contrast, or when the control surface is too flat to see comfortably. In such cases, even a small 15-20° tilt can make a big difference without affecting everyday usability. Furniture proportions and posture can also justify using a stand, such as when working with an adjustable-height desk.
– It’s also common that your computer keyboard sits closer to you than your first instrument or controller. That approximately 15 cm (about 6 inches) distance alone can justify a small tilt for the device placed behind it so that the controls remain visible and easy to reach (technically, I’d already call that a “second-row” position). If you have a pull-out master keyboard under the desk and sometimes step back from it, a tilted stand helps keep the upper device visible and usable without leaning forward, and when you push the keyboard tray back in, the tilt won’t be excessive.
– Still, there’s a less-known but ergonomically interesting and important case: negative tilt. Our wrists naturally rest in a slightly downward position, so when the wrist is constantly bent upward, such as when the elbow is lower than the hand, it can become tiring and uncomfortable over longer sessions. If your chair is higher or your desk lower than ideal, or if you perform standing or live on stage, a negatively tilted stand allows a more natural wrist position, reduces tension, and makes playing feel smoother, but only if you already know your instrument well and don’t need to look at your hands constantly. It can also be useful in a performance setting, where the audience should clearly see what you’re doing on the instrument. Although few people need this type of setup, it can be very useful in the right context. We only make a few such stands, since demand is rare, but I’m always happy to create one using the flexibility of 3D printing when it’s truly needed.
– Of course, sometimes it’s simply about aesthetics: the instrument looks better, or matches the angle of another piece of gear nearby.
Summary:
Most instruments don’t necessarily need a stand if they’re used at a comfortable height on a stable surface. However, even a slight tilt can improve visibility, access, and long-term comfort, especially when multiple devices share the desk. Negative-tilt setups are uncommon but can offer real ergonomic relief in specific working positions. The goal is always the same: natural hand posture, stable use, and uninterrupted creative flow.
__Interesting details you might not think about: Part 1
Rearranging Your Setup – Moving Things with One Hand
This is one of those interesting little details you usually only notice when it starts to get annoying. With lighter or medium-sized synths that you can lift with one hand, it might not seem important at first. But when your desk is full, glowing like a colorful spaceship, and you want to swap the position of two instruments, you quickly realize how much a practical setup can matter, especially if you have thought about it in advance.
If the stand moves together with the instrument, as if it were part of its own body, swapping positions takes just a few seconds. But if the stand only serves as a base, like two separate wedges or a regular “origami” laptop stand that sits too far from the edge of the gear to grab properly, the whole process becomes much more complicated. You have to lift one device off, find a temporary spot for it, and then move the other one into place. It’s not the end of the world, but it’s definitely inconvenient.
I’m not the only one who’s noticed this. I’ve discussed this with several musician friends who regularly rearrange their setups, and our experiences all point to the same thing. The most comfortable solution is always when the stand moves together with the instrument and doesn’t have to be handled separately.
If you think about this situation in advance, it’s worth choosing stands that move as one with the device, for example, side panels made of wood, plastic, or metal, or designs that slide on or clip securely to the gear.
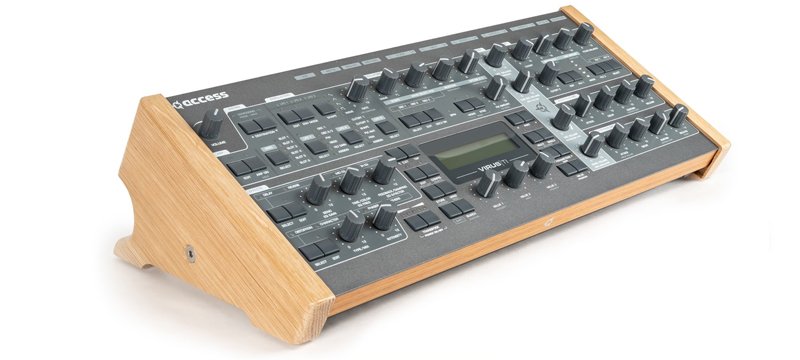
You can find these kinds of solutions from several makers, and it’s also the direction I focus on in my own designs (EasyLock style) because it makes rearranging and daily use so much easier.
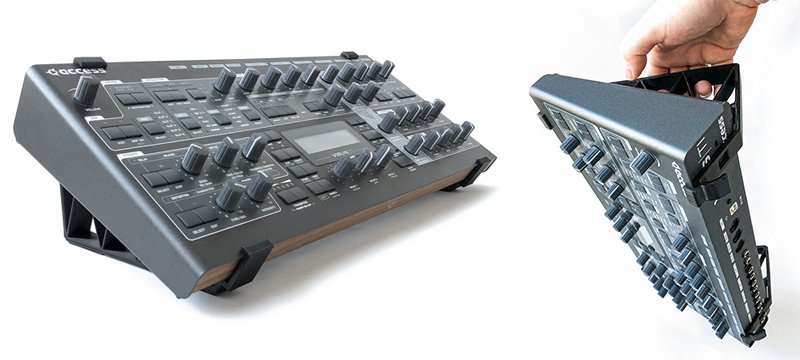
For me, a stand shouldn’t just be something that holds my instrument; it should feel like an organic part of it, moving and living together with the device instead of being just another detached accessory. That way, I don’t have to hunt for a third temporary spot every time I want to adjust my setup.
Summary:
It might sound like a small thing, but being able to move your gear easily makes your setup much more practical. When the stand moves naturally with the instrument, everything feels smoother and faster. It simply keeps your workspace flexible and your focus on making music.